Pros
- Numerous features
- Magnetic AI tracker
- Removable remote
- Works with hand gesturess
- Pairs easily with smartphone
Cons
- No tutorial
- Hand gestures didn’t always work
- Needs to reconnect to Bluetooth with every use
Smartphones created a new word and type of media: the selfie. There probably aren’t many people out there who haven’t at one time taken a selfie. But you don’t have to be content with taking them holding your phone at arm’s length – you can use the Hohem iSteady V3 Gimbal that will take the best selfies and snap other images and videos as well.
This is a sponsored article and was made possible by Hohem. The actual contents and opinions are the sole views of the author, who maintains editorial independence, even when a post is sponsored.
Everything You Need – Except Instructions
There is one thing that makes a new gadget more difficult: incomplete or confusing instructions. While the Hohem iSteady V3 Gimbal came with a charging cord, magnetic AI tracker, an allen wrench key, a warranty/disclaimer, and quick start guide, there was one thing it didn’t come with: instructions.
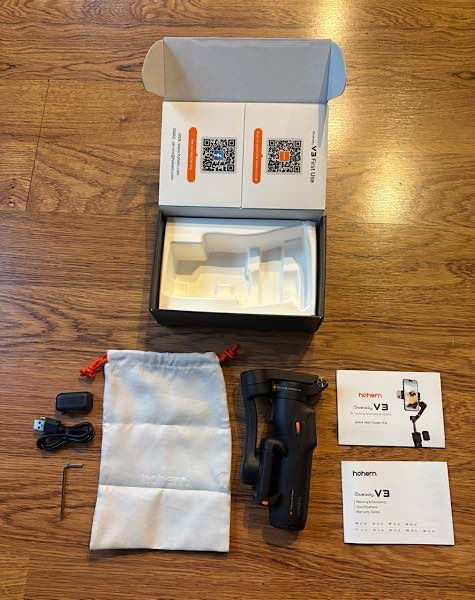
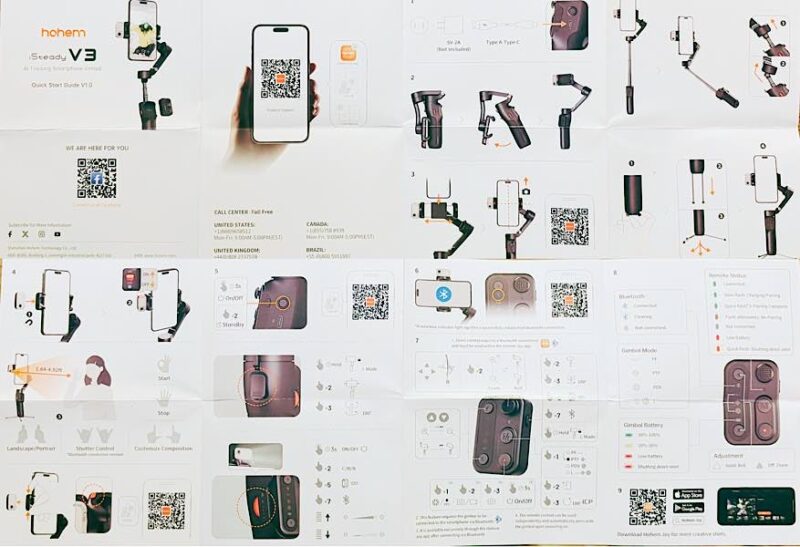
The quick start guide is, for the most part, pictures without words, so it was hard to figure out how to use the many buttons and removable remote for the many wonderful functions of the gimbal. I resorted to doing research on YouTube, and even then, had to watch a YouTube video three times and take notes on how to do everything to use the gimbal.
Once I watched some YouTube videos, however, I found that there are so many, many wonderful functions of this gimbal. It can do everything you’ve ever needed to do with a selfie stick or small tripod. Definitely, all the wonderful features cannot be included in this one review, and I am still discovering them after using it for a few weeks.

Setting Up the Hohem iSteady V3 Gimbal
Despite not having much documentation on the Hohem iSteady V3 Gimbal, it was a breeze to set up. After charging it via the USB-C cord, I tried to unfold it, insert my phone, and turn it on. I was totally confused, so watched my first video, and learned that you should never insert your phone into the gimbal with it turned on, as it can burn out the motors. Ideally, you want to charge it, download the Hohem Joy app, unfold it, insert your phone, then turn it on by holding the power button on the side for three seconds. Luckily, I didn’t damage it.
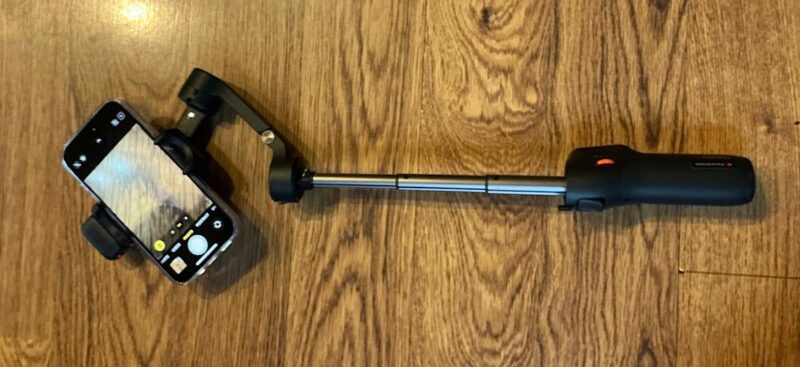
Once you turn the gimbal on, it comes to life. While it’s “floppy” when it’s off, once it’s on, the arm moves up and moves the camera to face you, assuming you are holding it with the buttons on the small attached remote facing you. That’s the first hint you get that this is a really cool gadget.
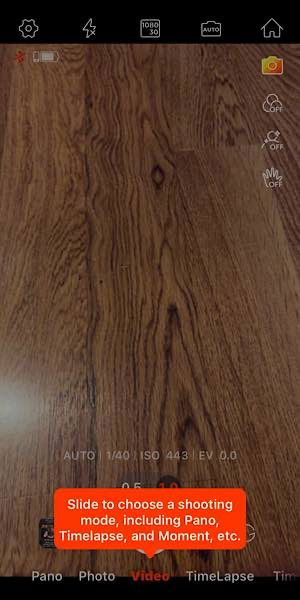
It was easy to connect the gimbal to the Hohem Joy app. It was a matter of connecting through Bluetooth and allowing permission to connect to my phone’s microphone and camera. It then started giving me an online tutorial. But I still hadn’t figured out the gimbal itself yet.
Using and Learning the Gimbal
I’ll note that I’ve used a gimbal before, but it’s been four years, and they’ve come a long way since then. I didn’t have any of the same concerns I had before, such as not being able to withstand the weight of my phone. The motors in the Hohem iSteady V3 Gimbal are very supportive, and I had no concerns trusting it with my new iPhone 16.
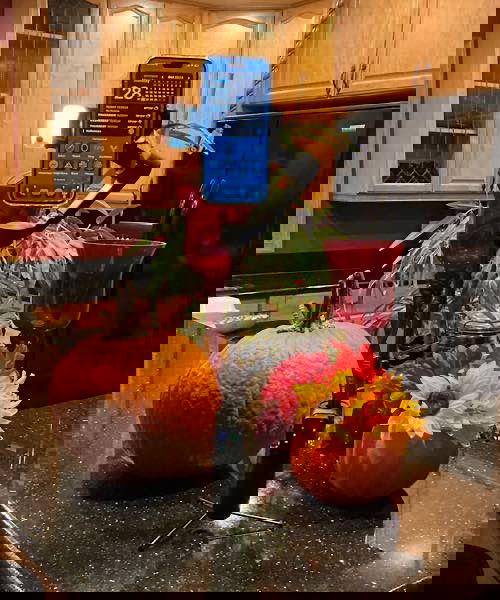
After watching a YouTube video twice and going through the app tutorial, I was getting together with family I hadn’t seen in a few years. I knew it was a good photo opp, so I took the gimbal with me. However, once we went outside to get some group pictures, I couldn’t remember how to use the features after watching the YouTube video twice. I was able to use it in the tripod mode to snap this picture of my sister-in-law’s farmette while I was trying to figure it out.

One thing that prevented me from using it that day was that I didn’t realize that it has to connect through Bluetooth each time I turn it on. I have to connect it, then open the app on my phone, and wait for it to reconnect. Then I’m ready to go. But I still didn’t know enough about which buttons did all the features to use it at my next two events. It’s hard to go through tutorials and notes during an event.
V3 Gimbal Features
What I really needed to do was sit down and really learn how to use the Hohem iSteady V3 Gimbal and try the features and buttons. I did that one night with a friend and completely fell in love with the gimbal. I can’t imagine attending events without it. It can be used as a handheld camera in regular or selfie mode, as well as a small tripod.
I opened it up in tripod mode in my kitchen and could see so many uses for it. For instance, it would have been perfect for those group photos I wanted to take. It also would have been great at the kids Halloween event earlier in the day where I helped run a game for the kids. In handheld mode, it would have been great at the adult Halloween party the night before.

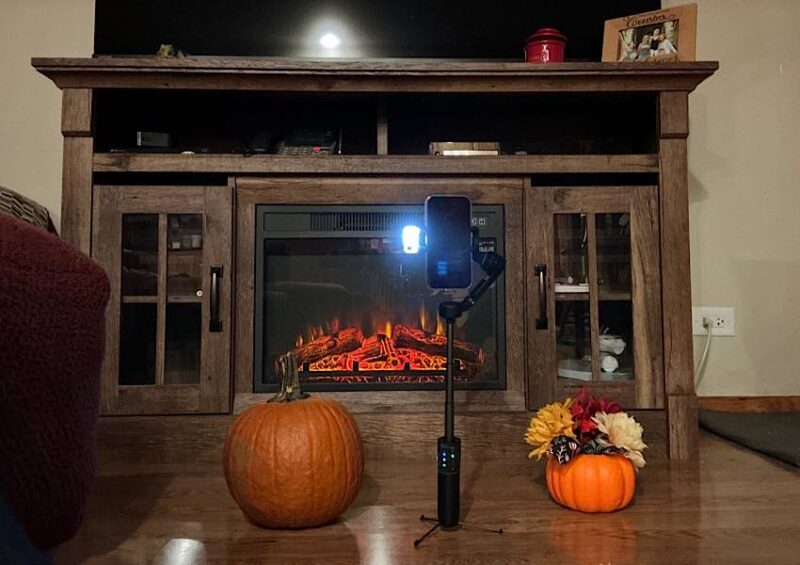
The gimbal has a tiny remote that pops out so that you can use it to take photos from a distance with the gimbal. It’s the same controls that you use when the remote is attached. My friend and I were able to do a selfie of the two of us, and you can see the tiny remote in my hand. You can also use hand gestures to operate the camera, but I had a little difficulty getting these to work. For instance, you can use the “okay” symbol to start the Magnetic AI Tracker and an open palm to have it stop. I couldn’t get it to turn off with the open palm.

There are two ways to take selfies. You can either have the gimbal turn your camera around to take a picture of you with the rear camera, or switch to using the front-facing camera via the Hohem Joy app. You have more control using the app, as when the gimbal flips your phone to the other side, you can’t see how you look or how you’re positioned. You can see that I’m illuminated here as well, as the magnetic AI tracker both tracks your movements to keep you in focus and has a light. You can change the tone and the strength of the light via the controls.

Despite the steep learning curve, the gimbal is not difficult to use. Once you know how to use it, it’s very easy. There are just so many options, features, and buttons, that you have to remember what they all do. Watching my friend use the gimbal, she was able to step in and quickly take her own selfie. Also within the controls, you can use the tiny joystick to move up and down and left and right, and you can also use the other buttons to control the zoom and focus. You can keep track of the battery life, Bluetooth status, and more on the tiny screen on the removable remote.
Availability
I have many upcoming events where I can’t wait to use the Hohem iSteady V3 Gimbal. It’s the perfect smartphone companion. I know it will help me take beautiful pictures on an upcoming Hawaii cruise. The on-land photos will be fabulous! But I’m not sure whether I’ll be able to use it on the ship, since it has to connect to Bluetooth each time it is turned on. Nevertheless, I will use this gimbal for many years to come.
However, I could have enjoyed it with other events had the gimbal not had a such a steep learning curve. That curve could be lessened quite a bit with a decent tutorial. The Quick Start Guide just isn’t sufficient for learning the many, many features, buttons, and scenarios.
Pick up the Hohem iSteady V3 Gimbal for, incredibly, only $129.
Our latest tutorials delivered straight to your inbox